Creator-Friendly Desk Without the Clutter
Ever tried to join a video call only to realize your workspace looks more like a tech junk drawer than a professional setup? Been there, done that—more times than I’d like to admit. If you work remotely and create content, or just want to stop apologizing for your background, let’s talk about building a creator-friendly desk that’s tidy, well-lit, and doesn’t look like you live in a camera shop. All in under 15 minutes of setup a day, with gear that won’t eat your lunch money.
Why Bother With a Video-Ready Desk?
Remote work is here to stay. Whether you’re recording tutorials, hopping on daily standups, or just catching up with friends, your desk is your stage. The good news? You don’t need a YouTuber’s budget to look sharp on camera. You just need to think a bit like a set designer—only with more coffee and fewer cables.
“A cluttered background doesn’t just look messy—it steals attention from you and what you’re saying.”
Let’s get real: nobody cares about your vintage router collection. But they will notice if your camera is at chin level and your face looks like you’re in witness protection.
The Real-World Desk Challenge
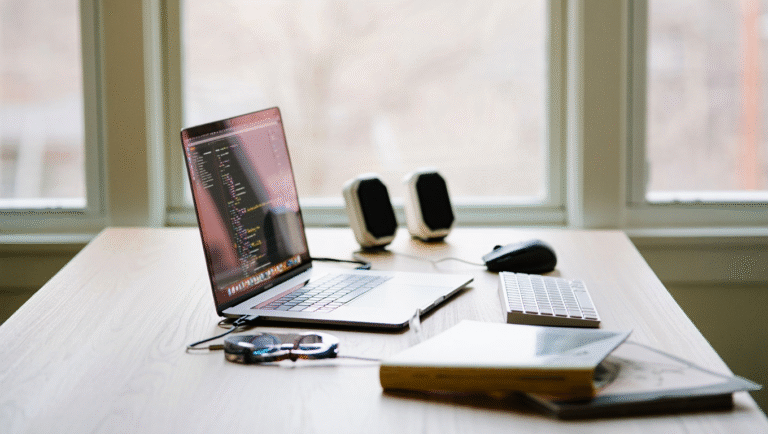
Here’s a quick snapshot from my life. Last year, I was recording a course from a rental in Asheville. The desk was tiny, the window faced a parking lot, and my only free outlet was under the table. Cables everywhere, a ring light in my glasses, and my webcam perched on a stack of books. Not ideal.
But after a few trial-and-error setups (and some creative swearing), I landed on a system that’s quick to set up, easy to break down, and doesn’t leave my workspace looking like a NASA control center. Here’s how you can do it too.
Step-by-Step: Creator Desk Setup for Real People
1. Start With the Background
First things first: what’s behind you matters more than you think. A tidy, neutral background is your safest bet. Avoid windows (backlighting = ghost face), piles of laundry, or busy bookshelves. If you can, face a blank wall or hang up a simple tapestry. Need to hide clutter fast? Keep a folding screen or a solid-color blanket handy.
2. Get the Lighting Right—Cheaply
The goal: soft, even light on your face, without harsh shadows or reflections. Here’s the quick fix:
- Position your desk so you face a window for natural light (ideal and free!).
- No window? Clip-on LED lights from Amazon ($20–$40) work wonders. Stick them just above your monitor, angled down at your face.
- Pro tip: Place a white piece of paper or foam board on the desk to bounce light upward and soften shadows.
Avoid: Overhead lights (they cast raccoon-eye shadows) and direct light behind you (turns you into a silhouette).
3. Camera Placement: Out of Sight, Centered
Your camera should be at eye level and just above your monitor. Never shoot up your nose. Here’s the 2-minute fix:
- Use a cheap laptop riser or a stack of sturdy books to lift your monitor.
- For external webcams, use a mini tripod (less than $20) placed behind the monitor—but make sure it’s not visible on camera.
- If you use your phone, a gooseneck clamp can attach to a shelf or monitor stand—no need for a bulky tripod.
4. Gear Placement: Out of Frame, Always Reachable
Rule of thumb: If you don’t use it every call, move it off the desk. Keep only:
- Keyboard and mouse (wireless = fewer cables)
- Notepad and pen
- Mug (coffee is non-negotiable)
- External mic, on a small boom arm or stand—just out of frame, but close to your mouth
Hide everything else in a drawer, box, or cable bag. Out of sight, out of mind (and out of your shot).
5. Cable Discipline: The 3-Minute Fix
Tangled cables are the enemy of a clean look. Here’s my foolproof system:
- Use velcro ties or reusable zip ties to bundle cables together. (A pack costs $7–$10.)
- Route cables behind the desk, not across it. 3M Command hooks under the desk are a lifesaver.
- Label each cable with masking tape if you move setups often—so you don’t unplug the wrong thing mid-call.
Quick Reference Table: Video-Ready Desk Essentials
| Item | Budget | Placement | My Favorite Option |
|---|---|---|---|
| Webcam | $30–$80 | Eye level, behind monitor | Logitech C920 |
| Lighting | $20–$40 | Above monitor, angled down | Neewer Clip-on LED |
| Microphone | $35–$120 | On boom arm, out of frame | Fifine K688 |
| Laptop Riser | $20 | Under laptop/monitor | Rain Design mStand Knockoff |
| Cable Ties | $7–$10 | Bundling all cables | VELCRO Brand Reusable Ties |
| Background Fix | $15–$40 | Behind you | Folding screen or tapestry |
15-Minute Daily Tidy Checklist
- Clear everything off your desk except essentials (keyboard, mouse, notebook, mic).
- Bundle and hide all cables with velcro ties.
- Wipe down your desk and monitor (no more fingerprints on camera!).
- Test your webcam angle—center your face, check the background for clutter.
- Flip on your lights and adjust for even brightness.
- Open a test video call (Zoom or Google Meet) to preview your setup.
- Stash away any extra gear or paperwork in a box, drawer, or under-desk organizer.
Gear & Tools to Make Life Easier
- Logitech C920 Webcam
- Neewer CL-06 LED Panel
- Fifine K688 Mic
- Rain Design mStand (or any sturdy riser)
- VELCRO Brand Cable Ties
- Folding Room Divider
- Google Meet (for a quick preview of your frame)
One Last Story
Last winter, I set up a makeshift studio in a friend’s cabin—think rustic chic, with more “rustic” than “chic.” The only spot with good light was in front of an ancient wood stove. I hung a gray blanket behind me, clipped a $25 light to a shelf, and propped my webcam on a stack of mystery novels. Nobody guessed I was recording from a log cabin, and the background got compliments. It’s not about having the fanciest gear—it’s about using what you’ve got, smartly.
Keep it simple, keep it tidy, and you’ll spend less time fussing with cables—and more time being the main character on your own screen.
Some links above may be affiliate. You pay the same price, and this blog may earn a small commission. Thanks for supporting practical, honest content!